Cottage cheese makes a protein-rich breakfast or snack and is a relatively simple cheese to make at home. This recipe makes a large-curd-style cottage cheese, and this method is generally known as a short-set.
60 minutes
48 minutes
3
INGREDIENTS AND EQUIPMENT AVAILABLE AT CULTURES FOR HEALTH
Mesophilic Direct-Set Starter Culture

Mesophilic Direct-Set Starter Culture
$19.99
From cheddar, Colby, and Monterey Jack to Feta, Chevre, and more, you'll enjoy the flavor and variety of homemade cheeses made using this starter culture.
Flora Danica Mesophilic Starter Culture
Mesophilic Aromatic Type B Starter Culture
Pocket Test Thermometer
Liquid Animal Rennet

Liquid Animal Rennet
$12.99
High quality single strength animal rennet. This non-GMO animal rennet is preferred for aged cheese as it creates a more desirable flavor and aroma during the aging process. Each bottle contains enough rennet to set (12) 2-gallon batches of cheese.
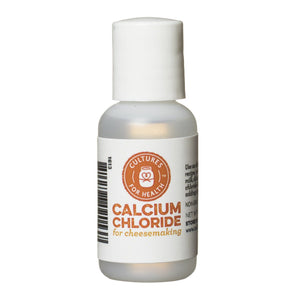
Calcium Chloride

Cultures for Health wants to help you take control of your food and learn a new skill in the process. Download our Cheesemaking Recipe book with tips and tricks for making your homemade cheese today.
EQUIPMENT:
- A large pot (if metal, be sure it's non-reactive such as stainless steel)
- A wooden spoon
- Colander
- Curd knife or other long blade knife
- A thermometer
- Butter muslin or tea towel
INGREDIENTS:
- 1 gallon milk (do not use UHT/UP milk)
- 1/4 tsp. mesophilic culture (mesophilic direct-set culture, flora danica, mesophilic aromatic type B)
- 1/4 tsp. liquid rennet or 1/4 rennet tablet
- 1/4 tsp. calcium chloride (optional)
- 1/2 cup whipping cream (optional)
INSTRUCTIONS:
- Heat the milk to 70°F.
- Remove the milk from the heat and allow the mesophilic culture to dissolve on the surface of the milk for approximately 2 to 3 minutes. Once the starter culture is dissolved, thoroughly incorporate it into the milk. Let the mixture sit for 30 minutes .
- If using calcium chloride, mix the calcium chloride into 1/4 cup of water. Add the mixture to the milk. Using up-and-down strokes (don't stir!), incorporate the rennet into the milk. Do not over-mix. Calcium chloride results in firmer curds and is helpful when using milk from the grocery store which is generally more processed than farm-fresh milk.
- Dissolve the rennet in 1/4 cup of water. Add the rennet mixture to the milk. Using up-and-down strokes (don't stir!), incorporate the rennet into the milk. Do not over-mix.
- Cover the pot and allow the mixture to sit at room temperature for 2 hours or until a firm curd has formed. (Milk should appear solid.)
-
Cut the curd using four sets of cuts:
- The first set should be parallel cuts every 1/2 inch from the top to the bottom of the pot.
- The second set should be perpendicular to the first set working from left to right every 1/2 inch.
- The third set should be diagonal cuts every 1/2 inch working from the top left of the container to the bottom right.
- The fourth and final set should be diagonal cuts every 1/2 inch working from the top right of the container to the bottom left.
- Once the curd has been cut, allow it to sit for 5 minutes then stir gently for 2 to 3 minutes.
- Warm the curds gently over low heat for 1 hour stirring continuously but gently. Stirring keeps the curds separated and allows the curds to heat evenly. Be careful to only increase the temperature of the curd 2° to 5°F every 5 minutes. It may be necessary to adjust the heat during the process.
- When the curd reaches 115°F, hold the heat at 115°F for 10 to 15 minutes. (It may be necessary to turn the heat on and off during that period to maintain the correct temperature.) Continue to stir the curd during this time to ensure even heating. The curds should be about the size of shelled peanuts and should be firm but not hard. The curds should bounce without breaking. Some experimentation may be necessary to find the right cooking period for the curd consistency you prefer.
- Carefully spoon the curds into a colander lined with a tea towel. Allow the whey (clear liquid) to drain off.
- Rinse the curds in very cold water andallow them to drain completely removing all traces of whey.
- Salt the curds and place in the refrigerator to chill.
The cottage cheese can be eaten in this dry state. If creamy cottage cheese is desired, add 1/2 cup whipping cream to the chilled curds.
Store in the refrigerator for up to 14 days.
Download our Cheesemaking Guide and Recipe book and start making your cheese today!


