Garlic added to any dish adds a strong, pungent flavor, especially when raw. But sometimes that heat is a bit too much. Lacto-fermenting is one way to enjoy garlic with all the enzymes and nutrients intact (raw) but without all the heat.
60 minutes
48 minutes
4
INGREDIENTS AND EQUIPMENT AVAILABLE AT CULTURES FOR HEALTH
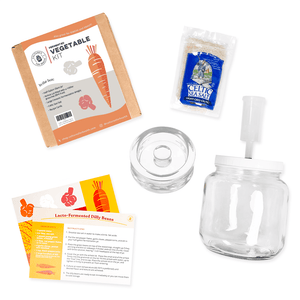
Fermented Vegetable Kit

Fermented Vegetable Kit
$40.99
Make tasty fermented veggies at home with our DIY Fermented Vegetable Kit!
This kit is also great for making kimchi, sauerkraut, and more! Equipment in the kit may appear different than pictured.
Lacto-fermenting garlic mellows it to a cross between raw and roasted garlic. And because it is simply brined whole cloves it is easy to do. The most work you’ll be doing is peeling the garlic. To peel the garlic you have a few options:
- Roast it in a low oven, around 200°F, until the skins loosen a bit.
- Peel them with a small sharp knife to keep them 100% raw.
- Put the whole head(s) of garlic, or the unpeeled cloves, into a small metal pot with a lid, then shake the covered pot vigorously for a few minutes. The paper on the garlic cloves will fall right off.
Once you’ve peeled the garlic it’s as simple as mixing all the ingredients and culturing. Why does garlic turn blue when lacto-fermented? This is a common question regarding this recipe, as the blue coloration can be a surprise to some. The blue color is caused by the formation of anthocyanins, which are water-soluble pigments produced when the garlic is exposed to oxygen during fermentation.
Learn how to make your Lacto-fermented garlic cloves at home and download our Lacto-Fermentation Recipe book today. This ancient fermentation method preserves food and is packed with probiotics that are good for gut health.
INGREDIENTS:
- 12-14 heads of garlic
- Brine of 1 quart water + 2 Tbsp. sea salt
- Herbs such as basil or oregano if desired
INSTRUCTIONS:
- Peel garlic as indicated above. Fill a quart jar within 1 inch of the top with the garlic cloves.
- Pour brine and herbs over garlic cloves.
-
Allow to ferment for 3 to 4 weeks before moving to cold storage. The longer these sit in cold storage the more delicious they get!
Click to download our Lacto-Fermentation Guide and Recipe book today and start making your Lacto-fermented garlic!


