These versatile little cheese balls are a great party snack or addition to lunch. Kefir cheese stored this way keeps longer, and the olive oil adds a great flavor and smoothness to your cheese.
15 minutes
45 minutes
4
INGREDIENTS AND EQUIPMENT AVAILABLE AT CULTURES FOR HEALTH
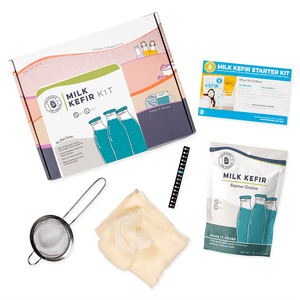
Milk Kefir Starter Kit

Milk Kefir Starter Kit
$46.99
Designed for beginners, this kefir starting kit contains our Milk Kefir Grains plus 3 tried-and-true culturing supplies to make it easy to get started making milk kefir at home. Just add milk!
Packaging and Equipment in the kit may appear different than pictured.
Grey Celtic Sea Salt
INGREDIENTS:
- 1 quart plain milk kefir, thick and sour
- 1/2 tsp. sea salt
- Olive oil
- Herbs, if desired
INSTRUCTIONS:
- Line a clean colander with butter muslin and place it into a bowl. Pour the kefir into the lined colander and tie up the ends of the muslin to make a draining sack. Hang the sack to drain.
- Allow the kefir to drain for one day or until the cheese is the desired consistency and will mold easily into a ball in the palm of your hand.
- Once the cheese is ready, untie the draining sack and scrape the kefir cheese out into a plastic bowl or container.
- Mix in salt, and blend well with a rubber spatula. Add herbs and spices, if desired.
- Scoop the cheese out and roll it into small balls, about the size of ping-pong balls.
- Fill a clean quart jar with olive oil about halfway. Gently drop the cheese balls into the oil.
- Once all the cheese is made into balls, top the jar off with olive oil and seal tightly with a lid.
- Kefir cheese balls in olive oil will store well in the pantry or the fridge and will generally keep for months.
- If the cheese balls begin to crumble after a few weeks, the cheese was too dry. Try adding a Tbsp. of fresh cream with the salt in the next batch.


