Colby cheese was developed in America and named for the town in Wisconsin where it originated. Colby is a milder form of cheddar, and a washed-curd cheese, making it moister than traditional cheddars. It is one of the more popular cheeses and its easy process and short aging time makes it a good basic beginner hard cheese.
30 minutes
180 minutes
4
INGREDIENTS AND EQUIPMENT AVAILABLE AT CULTURES FOR HEALTH
Fresh Cheese Making Kit

Fresh Cheese Making Kit
$45.99
Our most comprehensive choice, the Fresh Cheese Kit makes five varieties of soft cheese: feta, cottage cheese, cream cheese, fromage blanc, and traditional quark.
Packaging and Equipment in the kit may appear different than pictured.
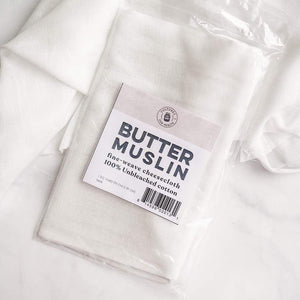
Butter Muslin

Butter Muslin
$7.99
Butter Muslin is a tightly woven cloth, similar to cheesecloth, used for draining, pressing, and straining soft cheeses, yogurt or milk kefir. Butter muslin cloth also works as a breathable jar cover for all sorts of fermenting applications.
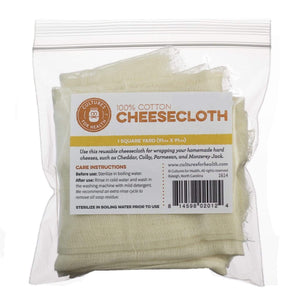
Cheesecloth

Cheesecloth
$7.99
A looser weave than our butter muslin, this 100% cotton cheesecloth is great for wrapping cheeses and draining whey from all sorts of cultured foods.
INGREDIENTS:
- 2 gallons whole milk
- 4 drops cheese color dissolved in 1/4 cup cool water (optional, for color)
- 1 packet direct-set mesophilic starter
- 1/2 tsp. liquid rennet dissolved in 1/4 cup of cool water
- About 2 Tbsp. Cheese salt
INSTRUCTIONS:
- Heat the milk to 86°F.
- Add the culture/starter by sprinkling it on top of the milk, and let it rehydrate for a few minutes before stirring it in with an up-and-down motion of the spoon.
- Cover the milk and allow it to set, undisturbed, for 1 hour. If you are using coloring, stir it into the milk now.
- Make sure that the milk is still at 86°F. Add the diluted rennet. Mix it in well, using gentle up-and-down motions. Stir it for 1 minute, then stir just in the top part of the milk for 2 more minutes. Cover it and let it set, undisturbed, for 1/2 hour.
- If after 30 minutes you have a clean break, cut the curd into 3/8-inch cubes. Stir them gently, then let them set for 5 minutes.
- Heat the curds and whey 2°F every 5 minutes until they are at 102°F. Stir to prevent the curds from matting (sticking together). Maintain the temperature at 102°F for half an hour. Periodically stir them gently during this time, trying to keep them from matting.
- Pour off the whey until the amount in the pot just covers the curds. Continuing to stir, add 60°F (cool) water until the temperature in the pot reaches 80°F. Maintain the 80°F temperature for 15 minutes. Stir frequently.
- Drain the curds in a colander lined with cheesecloth. Allow them to drain for 15 minutes.
- Mill the curds, breaking them to thumbnail-sized pieces and gently mixing in the salt.
- Line a 2-pound mold with cheesecloth and pour the salted curds in. Press them at 20 pounds of pressure for 20 minutes.
- Take the cheese out of the mold, peel away the cheesecloth, flip it over, rewrap, and replace it into the mold. Crank the press to 30 pounds and leave it for 20 more minutes.
- Flip it again in the same manner as before, then press at 40 pounds for 1 hour.
- Flip it again and press it at 50 pounds for 1 hour.
-
Take the cheese out of the mold, take off the cheesecloth, and air-dry it somewhere cool and dark for a few days, or until the outside is dry to the touch. Wax it, and age it at around 55°F for 2 to 3 months.


