Reminiscent of the rich, buttery snack crackers that line grocery store shelves, this gluten-free version comes together quickly. This recipe also utilizes “discarded” sourdough starter as it is not needed for leavening.
15 minutes
45 minutes
4
INGREDIENTS AND EQUIPMENT AVAILABLE AT CULTURES FOR HEALTH
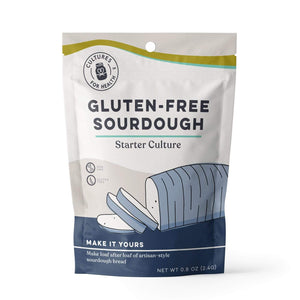
Gluten-Free Sourdough Starter

Gluten-Free Sourdough Starter Culture
$14.99
Not eating gluten? No problem! With the help of our gluten free sourdough starter culture, you can make tangy, fluffy sourdough bread that’s gluten-free.
The GF sourdough starter is an heirloom culture, meaning you'll make endless bread dough all from one starter! Just add water and gluten-free flour.
Sourdough is perfect for beginners, and this gluten free sourdough bread starter is a very forgiving culture and one of the easiest to work with.
INGREDIENTS:
- 1 cup brown rice flour
- 1/2 cup sorghum flour
- 1/2 cup tapioca flour, plus more for kneading
- 1/2 tsp. baking soda
- 1 tsp. salt
- 1/2 cup cold butter, cut into chunks
- 1/2 cup gluten-free sourdough starter
- 1/4 cup water
- 1 egg
INSTRUCTIONS:
- Preheat oven to 400 degrees F. Line two cookie sheets with parchment paper or butter them generously.
- In a medium mixing bowl, whisk together the flours, baking soda, and salt. Cut the butter into the dry ingredients using a fork, a pastry cutter, or clean hands.
- In a glass measuring cup, whisk together the gluten-free sourdough starter, water, and egg. Pour this mixture into the flour-butter mixture and stir until a stiff dough comes together. Knead for 1-2 minutes to bring the dough into a cohesive mass. If the dough is sticky, dust the dough and your hands with tapioca flour. If it is too dry, add one tablespoon of water and mix, adding additional tablespoons of water as needed.
- Divide the dough evenly into two pieces and place them on the prepared baking sheets.
- Press or roll the dough right on the baking sheet using your hands or a rolling pin. If the dough is too sticky, use a sheet of parchment paper or plastic wrap on top of the dough while pressing or rolling. Roll the dough all the way to the edges until it is just under ¼ inch in thickness.
- Use a pizza cutter to cut the dough into 1.5 inch squares. Dock each of these squares several times with a fork. Repeat with the second ball of dough.
- Place crackers onto the middle rack of the preheated oven. Bake for 10-12 minutes or until they are just starting to brown on the bottom and edges.
- Remove the crackers from the oven and allow to cool completely before pulling apart to serve.
Once cooled, these crackers can be stored in an airtight container for up to a week.


