Havarti is an interior-ripened cheese that is rindless and smooth with small and irregular openings (“eyes”). It has a cream to yellow color and an aroma that can be somewhat sharp in the stronger varieties. The taste is buttery, from somewhat sweet to very sweet, and it is slightly acidic.
30 minutes
48 minutes
4
INGREDIENTS AND EQUIPMENT AVAILABLE AT CULTURES FOR HEALTH
Fresh Cheese Making Kit

Fresh Cheese Making Kit
$45.99
Our most comprehensive choice, the Fresh Cheese Kit makes five varieties of soft cheese: feta, cottage cheese, cream cheese, fromage blanc, and traditional quark.
Packaging and Equipment in the kit may appear different than pictured.
Liquid Animal Rennet

Liquid Animal Rennet
$12.99
High quality single strength animal rennet. This non-GMO animal rennet is preferred for aged cheese as it creates a more desirable flavor and aroma during the aging process. Each bottle contains enough rennet to set (12) 2-gallon batches of cheese.
Cheese Salt

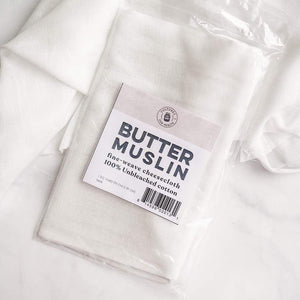
Butter Muslin

Butter Muslin
$7.99
Butter Muslin is a tightly woven cloth, similar to cheesecloth, used for draining, pressing, and straining soft cheeses, yogurt or milk kefir. Butter muslin cloth also works as a breathable jar cover for all sorts of fermenting applications.
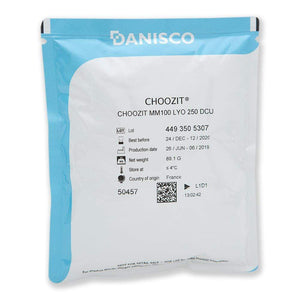
Danisco Direct Set Starter Culture For Cheese MM100

Danisco Direct Set Starter Culture For Cheese MM100
$10.99
For soft-ripened and fresh (unripened) cheeses including brie, camembert, havarti, gouda, edam, feta, blue, chevre, and more!
Click to download our free Cheesemaking Recipe Book today, which includes tips and tricks for making delicious homemade cheese.
INGREDIENTS:
- 2 gallons whole cow milk
- ½ tsp. MM100 Mesophilic Starter Culture
- ½ tsp. liquid rennet
- Cheese salt or other non-iodized salt
INSTRUCTIONS:
- Heat milk over low heat to 70°F.
- Turn off the heat. Sprinkle the starter over the surface of the milk, and allow it to rehydrate for 5 minutes. Stir in with a whisk, using up-and-down motions, for 1 minute. Cover and maintain the temperature at 70°F for 45 minutes to allow the milk to ripen.
- Turn the heat back on and raise the temperature slowly to 86°F. After the milk has reached this temperature, add the diluted rennet by pouring it through a slotted spoon into the milk. Then stir it in for about 1 minute, using an up-and-down motion.
- Cover the pot and let it sit undisturbed, for 35-40 minutes, or until you have achieved a clean break between curds and whey.
- Maintain the temperature of the milk at 86°F. Cut the curds into ½-inch pieces; stir them for 10 minutes, then let them rest for 5 minutes, covered.
- Ladle out about ⅓ of the whey in the pot, then add 3 cups of hot (130°F) water. When the temperature in the pot reaches 92-94°F, add 3 more cups of hot water. Stir 5 minutes, then add 2 more cups of hot water.
- Add salt and stir it into the curds and whey. Keep adding water that is 130°F as needed to maintain the curds and whey at a temperature of around 97°F. Constantly stir the curds until they begin to feel a bit springy when gently squeezed. This should take about 20 minutes.
- Ladle off enough of the whey to expose the curds.
- Using damp butter muslin, line a clean, 8-inch tome mold and place it on a draining rack. Gently scoop the warm curds out of the pot with your hands or a cheese spoon into the lined mold. Press curds into the mold gently with the back of your hand. Pull out any wrinkles in the butter muslin, and fold the tails of the cloth over the top of the curds. Place the follower on top of the covered curds, and press the cheese at 8 pounds of pressure for 30 minutes.
- Take the cheese out of the mold, peel away the butter muslin, flip the cheese over, and re-dress with the muslin. Place it back into the mold and press again at 8 pounds for 30 more minutes. Repeat this process for about 3-4 hours or until all the excess whey has been expelled. When pressing is complete, leave cheese in the mold without any pressure, out on the kitchen counter for about 3 more hours.
-
Place the cheese in the refrigerator and leave it there overnight. It is ready to eat now, as a fresh, young cheese, or continue to age it by brining and storing it, if you choose.
BRINING INSTRUCTIONS:
- Make a 1/2-gallon of fully saturated brine (32 ounces salt in 1-gallon water) and seal it with a lid. Leave in the refrigerator overnight.
- Take the cheese and the brine out of the refrigerator and place them together into a non-corrosive container with a lid. Place the covered container of brine and cheese back into the refrigerator for about 8 more hours.
- Take the cheese out of the brine and pat it dry with clean paper towels. Place it on a rack to air-dry on the counter for about 12 hours, away from drafts and direct sunlight.
-
Age the cheese at 50°-55°F and 85% humidity for 1 month, or as long you wish to age it. Flip the cheese about 3 times per week during the aging period and remove any unwanted mold with cheesecloth soaked in brine.
Have you ever wanted to make your homemade cheese? Download our free Cheesemaking Guide and Recipe book today.


